The Perfect Finish for Your Pool
A simple, step-by-step guide to transforming your concrete with beautiful stamped designs, adding elegance and durability to your pool area or outdoor space. Let us help you create the perfect finish.
Stamped Concrete Maintenance Tips
Clean Regularly:Use mild detergent and water. Avoid harsh chemicals.
Reseal Every 2-3 Years: Protect and maintain appearance.
Quickly Remove Stains: Clean spills to prevent discoloration.
Avoid Heavy Loads: Prevent damage by not parking heavy vehicles.
Winter Care: Use non-corrosive alternatives to deicing salts.
Proper care keeps your stamped concrete looking great for years!
Preparing and Forming for Concrete Stamping: A Step-by-Step Guide
Step 1: Forming
Begin by marking the boundaries of the area with stakes and string lines to define the layout. Ensure the forms are made of sturdy material like wood or plastic to hold the wet concrete securely. Use stakes or pins to anchor the forms firmly and keep them level. Double-check the alignment and level of the forms to ensure the final surface is accurate and uniform.

Step 2: Adding Color
Measure the integral color as specified and add it to the concrete mix for uniform coloration throughout. Allow the mixer to run for at least 5 minutes to blend the color thoroughly and avoid streaks. Monitor the mixing process to ensure the pigment is evenly distributed. Properly mixed color provides a long-lasting and consistent base for stamping.

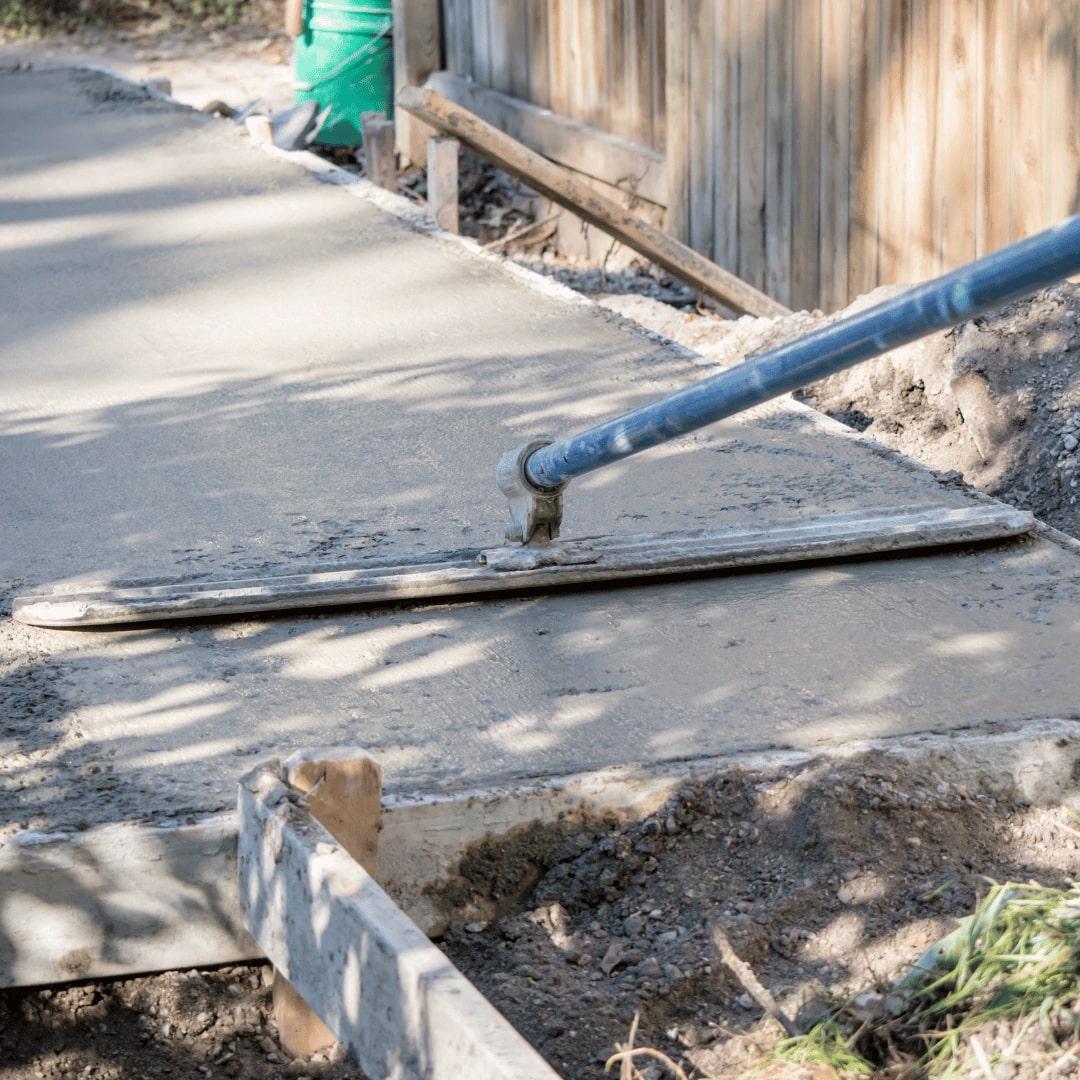
Step 3: Bull Floating the Concrete Surface
After pouring, use a bull float to smooth and close the surface without overworking it. Avoid excessive manipulation, especially in freeze-thaw environments, as it may compromise the durability of the concrete. Integral color reduces the need for overworking compared to Color Hardeners. Ensure the surface is level and smooth, creating a proper foundation for stamping.

Step 4: Applying the Release Agent
Apply a release agent evenly to the surface using a brush, burlap bag, or by hand. This agent prevents stamps from sticking to the concrete, ensuring clean impressions. It also adds depth and an antique appearance after washing. Proper application enhances both the functionality and aesthetics of the final stamped surface.

Step 5: Stamping the Concrete
Using patterns like the Ashlar Slate, press the stamps into the concrete with firm, even pressure. Durable stamps like those from Stampcrete produce authentic textures and detailed designs. Work methodically, ensuring each stamp aligns properly with the adjacent impressions. This step is crucial to achieving a professional, high-quality result.

Step 6: Washing Off Excess Release Agent
Once the concrete sets, wash off the release agent using a garden hose and scrub brush. Adjust the washing to leave some agent in the recesses for accentuating joint lines. This process creates an antique, textured look that highlights the stamped patterns. The final balance of washed and retained agent defines the overall aesthetic.

Step 7: Sealing the Surface
Ensure the surface is completely dry before applying the sealer to prevent bubbling or peeling. Use a Chapin Sprayer or roller to apply two even coats of a solvent-based sealer. This protects the concrete from wear, stains, and environmental damage while enhancing its color and shine. Proper sealing ensures durability and longevity.

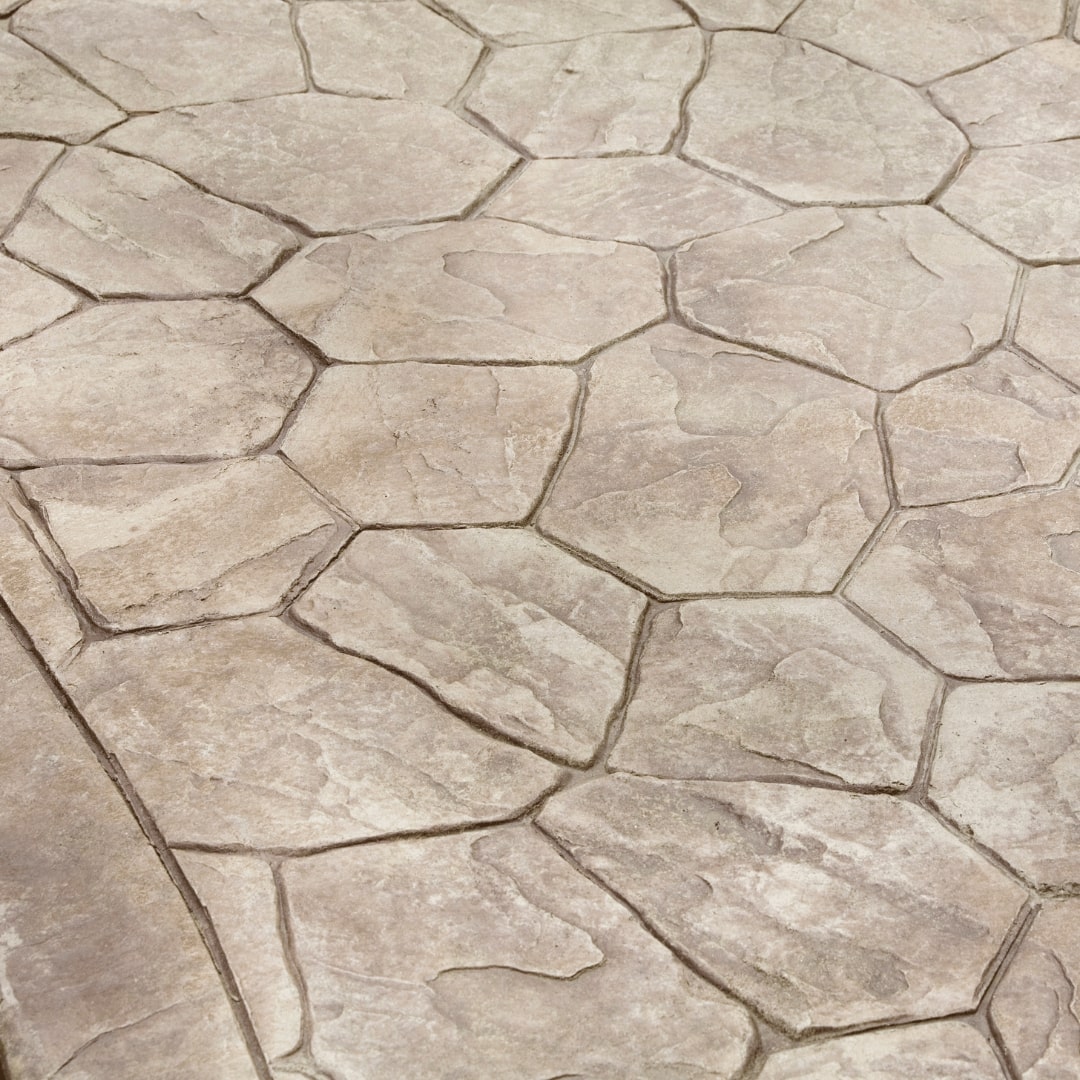
Step 8: Finished Stampcrete Surface
The result is a visually stunning, durable, and professionally finished stamped concrete surface. The textured patterns, antique accents, and sealed finish make it a centerpiece for any project. It combines functionality with beauty, providing long-lasting satisfaction for both contractors and clients. A well-executed surface adds value and appeal to any property.
Would you like further elaboration or visual guides for any specific steps?
